Saturday, June 29, 2013

Road Trip {MN-WI-IL-IA-MN}

Sorry, no new craft project this weekend.  Partly because I was out of town for nearly a week this month and partly because I just haven't had the right motivation to do anything crafty.  But fear not, I have something for you.  The reason I was out of town was because I took a road trip to Illinois to see my sister.  And I documented it with Instagram.  So, in case you aren't following me on Instagram - here are some highlights from my trip:

My plan was to follow along the Mississippi River as much as possible on the way to my sister's in East Peoria, IL.  My first stop was Hastings, MN but before hitting the Great River Road (and the aforementioned Mississippi River), I stopped to see the Vermillion Falls.


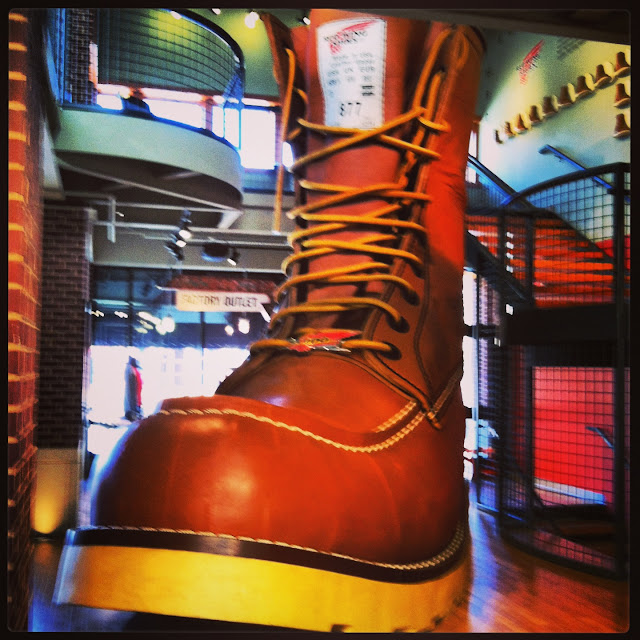
Next stop - Red Wing, MN.  Home of Red Wing Shoes and the world's largest boot (size 638 1/2 D in case you are wondering).

Craft Room Confidential

This boot is on display in the downtown Red Wing Shoe Store along with the Red Wing Shoe Company Museum.

Continuing down the Mississippi, I stopped at a little wayside area in Lake City to check out Lake Pepin.  Lake Pepin is a naturally occuring lake and the widest naturally occuring part of the Mississippi River.  Neat, huh?

Craft Room Confidential

And also apparently the birthplace of waterskiing.

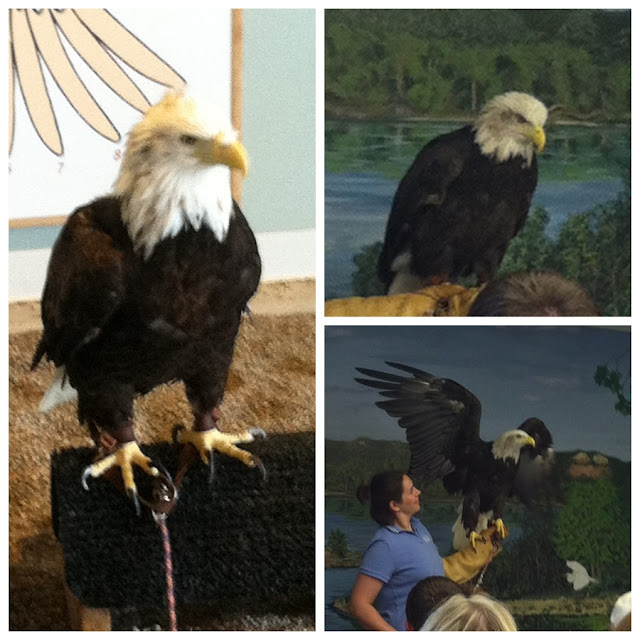
Next stop - Wabaha, MN.  You may be familiar with the town from the Grumpy Old Men movies.  But I wasn't looking for any grumpy old men.  I was there to visit the National Eagle Center.  I learned a lot of interesting information about eagles at their eagle program, including an upclose look at a couple of bald eagles and a golden eagle.

Craft Room Confidential

Step out the back door of the Eagle Center and you are right on the banks of the Mississippi River.

I headed south for a little bit and crossed the river at LaCrosse, WI.  There I made a stop at Olive Juice Quilt Shop and had a very late lunch/early dinner before continuing south on the Great River Road on the Wisconsin side of the river.  {Apparently there was nothing interesting in Wisconsin because I took no pictures.}

Past Prairie Du Chien, I headed away from the river and stopped in Galena, IL for the night.

After the overnight stop in Galena, I continued south and back on the Great River Road in Illinois.  That was until I came to Interstate 80 and I finished my trip to East Peoria on the always exciting interstate system.

Craft Room Confidential

But not before a little photo op of the Mississippi River from the rest stop.

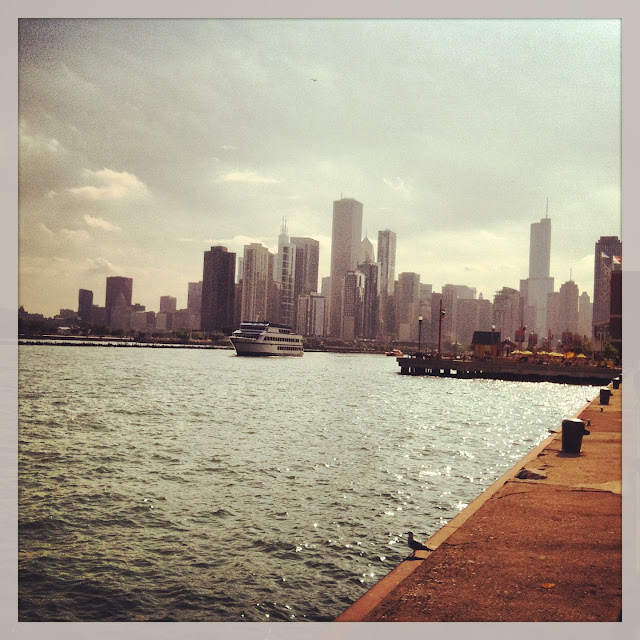
Apparently there isn't really anything to do in Peoria, so on Saturday my sister and I went to Chicago {about 2 1/2-3 hours away}.  Since we had both been to Chicago a few times previously, we tried something new - a Stray Boots tour.  If you are not familiar with Stray Boots {and I wasn't until I stumbled across them while researching things to do in Chicago} just think urban tour + scavenger hunt.  And it was a lot of fun!  {They are available in about a dozen or so cities and I highly recommend you check it out.}  We actually did two - Magnificent Mile and Navy Pier.

Craft Room Confidential

Before leaving the city, I made sure we stopped for ice cream at the Ghiradelli Ice Cream and Chocolate Shop.  So yummy!

Sunday, we went to Starved Rock State Park for some hiking.  {That was after we got lost trying to find another park.}  The park is known for its interesting rock formations, canyons, and waterfalls.  The hiking there was really good and the scenery was pretty.

Craft Room Confidential

Before I knew it, my long weekend was coming to a close and it was time to head back home.  The return trip went through Iowa.  First, a stop in Iowa City for a quick look at my alma mater - The University of Iowa.

 Craft Room Confidential

The old capitol was looking picture perfect.  Then it was off to my parent's house in northeast Iowa.  

Craft Room Confidential

I stayed overnight and in the morning got in a nice walk with their dog, Sasha, just before a quick shower hit.  Then it was back home but not before one last stop - The Spam Museum in Austin, MN.

Craft Room Confidential

Now before you start laughing, let me tell you that this is a really good museum.  If you are ever in the area, you should definitely check it out.  Besides, they give out Spam samples there.

That was my road trip.  Thanks for letting me share it with you.  Have a great weekend!

I am sharing this at some of my favorite parties.

Saturday, June 22, 2013

iPhone Sleeve with Strap and Pockets

I have a simple project to share with you today that is a great scrapbuster.  It is quick and easy - the best type of project in my opinion.


Do you ever have this problem - You are going out for a walk but you don't have any pockets and thus no place to hold your phone, keys, and/or money?  Happens to me all the time.


I've tried a fanny pack but didn't really like it.  So one morning I did some brainstorming and came up with this handy dandy iPhone sleeve with a strap and pockets.

pocket for your keys

The starting point of this creation was this easy tutorial for an iPhone Sleeve by Erin Erickson at Dog Under My Desk.  I just simply added two pockets and a strap.  And viola - I had a solution to my no pocket problem!

pocket for your cash and i.d.

For my fabrics, I just headed to my stash.  I had bought some fat quarters when I was making my friendship braid quilt thinking I was going to do something different on the back but I didn't end up using them.  And as I bonus, there was some extra binding from the quilt that would be the perfect starting point for the handle.


It took me just over an hour to complete and before I took it out for a spin, I posted a picture to instagram.  It wasn't long before my sister saw it and requested one of her own.  Perfect, that would give me a chance to tweak anything that I didn't like and to make a tutorial so I could share this project.


So, here goes:

STRAP
  • Piece together 2" strips to make two strips that measure 54" in length (feel free to make smaller or bigger, shorter or longer.  In fact, I think I might even use 1 3/4" or even 1 1/2" strips if I make another one.  The first one I made was 2 1/2" but I felt that was a little too wide.)
  • Cut 2" strips from fusible interfacing and fuse to the wrong side of the each strip.
  • Place the two strips together and stitch down one of the long sides with a 1/2" seam allowance.  Press the seam open.  Also press under 1/2" on the short sides.  (Remember those tweaks I mentioned?  This is one of them but yet I failed to do it while I made the second one so you won't be seeing a nice clean finished edge in the photos.)
  • Fold in one of the outer raw edges so that it just touches the raw edge of the seam allowance and press.
  • Repeat for the other outer raw edge.
  • Fold the handle strip in half along the seam, with wrong sides together and press.
  • Edgestitch down all four sides.
  • Topstitch each side.
  • Set aside.


SLEEVE And POCKET
  • SLEEVE - Cut two pieces of fabric 10 3/4" x 4".
  • SLEEVE - Cut one piece of lightweight interfacing 10 1/2" x 3 3/4".
  • SLEEVE - Cut one piece of fusible fleece 10 1/2" x 3 3/4"
  • SLEEVE - Fuse interfacing and fleece to wrong side of fabric (one on each) and set aside for a moment.
  • POCKET - Cut two pieces of fabric 7 3/4" x 4".
  • POCKET - With right sides together, sew short sides with 3/8" seam.
  • POCKET - Turn right side out, press, and edgestitch along sewn edges and set aside while you work on the sleeve again.

Sorry, the bottom row of pictures is out of order.
  • SLEEVE - Place fabric right sides together and sew all around with a 3/8" seam allowance, leaving a 3" gap on one side for turning.
  • SLEEVE - Clip corners.
  • SLEEVE - Turn right side out and carefully poke out corners.
  • SLEEVE - Press well.
  • SLEEVE - Hand stich the opening shut (unless you are lazy like me.)
  • With the sleeve right side facing up, measure 1 1/2" from left edge and place the pocket, also right side up.  Baste along the the unfinished pocket edges.  (Or, for the lazy people like me, simply pin together.)
ATTACHING The STRAP
  • Place one end of the strap near the top left of one short end of the sleeve, right sides facing up on each piece.  I didn't really measure, use your best judgement as to where you would like the strap to be.
  • Top stitch across the top, making sure to catch the strap.
  • Take the other end of the strap and place near the top left of the other short end of the sleeve, this time with right sides together.  I sort of messed this part up in my first one which resulted in an always twisted strap when wearing.  Not a big deal, but I recommend taking the time to think about this step.
  • Top stitch across the top, making sure to catch the strap.

  • Fold sleeve in half.
  • Stitch as close to the edges as you can, making sure to catch all of the layers.

And that is all!  Now go out for a walk and enjoy the fruits of you labor.


PLEASE NOTE - measurements are for an iPhone 4 or 4S.  You will need to make adjustments if you have a different phone.

I am sharing this at these parties.

Saturday, June 15, 2013

Cosmo Bag

Follow my blog with Bloglovin

I finally finished this bag!  It has only been on my project list since March 2012.


The pattern is from Amy Butler's Style Stitches book.  It is the cosmo bag with long handle.  There were a few steps that I had to think hard about in order to understand but overall it was a pretty easy sew.  Some day I might even make the bag with the short handle because I really love the look of this bag.


I think I originally had planned for the large flower print to be the exterior of the bag but when I finally got around to making it, I changed my mind.  And I'm really happy that I did.  For some reason, maybe because of that switch, I was a little short with the fabric for the interior that I had to make one side panel with the trim fabric.  Oh well, it's in the inside and it is still all coordinated.


Speaking of the inside, it is nice and roomy with four pockets.


And how cute is the large button and the button loop?  I am super in love with this bag.  So glad I finally made it.

Have a great weekend.


Sunday, June 9, 2013

Fabric Buckets

Well, I had hoped to have a new project to share with you this weekend but I haven't finished it yet.  So you get the last project from Christmas that I haven't shared yet.


I made these two round bottomed fabric storage buckets for my niece and nephew.  I followed this great tutorial from Film In the Fridge.  I made the large buckets but cut the height down just a little.


My niece loves cats so this fabric was perfect for her.  I actually had it already but had not gotten around to making anything with it.


And for my Vikings fan nephew, this was the obvious choice.

Have a great week.

I am sharing at these parties.

Saturday, June 1, 2013

{Not So Confidential} - May in Review

I recently learned that the Minnesota Landscape Arboretum is free after 4:30 every third Thursday of the month.  I know where I will be going after work every third Thursday of the month.


{What I made} Craft Projects


{What I made} Yummy Eats
{What I read} Previous count - 12
  1. The Witness by Nora Roberts
  2. F is for Fugitive by Sue Grafton
  3. I've Got Your Number by Sophie Kinsella
  4. G is for Gumshoe by Sue Grafton